Thursday, August 31, 2017

How fun to make some Wish Bracelets

Today I am sharing with you a fun project you could make for yourself or make them with your children or grandchildren.


These are called Wish Bracelets and the saying goes you make a wish while making them and then you wear them and when they wear out, one of the beads will fall off and your wish will come true.


These are so very easy and fast to make, you will end up making a bunch of them.

You start with Divine Twine and in any color you want. Then make sure you pick out your beads with a big enough hole the twine will go through the hole.

Next you measure out your twine, I cut my three pieces at 15 inches each.


Put your three strands together and tie a knot at one end.


For the next step for me it was the easiest to tape down the end onto a firm surface.


Now you get to start braiding. Just braid the way you always do nothing special. Braid down about 2 inches.


Now it is time to start adding the beads. Start with the twine at the far right and add your first bead. Once you have the bead on cross it over the same way and continue braiding. This is your choice to do one bead right after the other or leave a little space in between the beads. I did it both ways. Make sure you ALWAYS add your bead on the right and cross it over.


This one was made with a space in between the beads.


Now you just tie the two knotted ends together. Test fit it around your hand and wrist to make sure it will fit. If you are making them with children or grandchildren you may have to adjust to make them smaller.


I hope you will give this a try and have fun making them with your children or grandchildren. Don't forget to check out all the beautiful colors of Divine Twine at Whisker Graphics store


Wednesday, August 23, 2017

A little song for your birthday

What a fun card sketch to work with this month at Stick it Down.  I hope you will give this sketch a try and link it up over at the blog.  Below is the sketch and my take on the sketch.


Wednesday, August 16, 2017

Take Me Out to the Ballgame

My turn to share a challenge over at the Creative Inspiration forum.  Why not come on over and check out my challenge as well as some of the other great challenges.


Tuesday, August 1, 2017

It's all about the Twine and the Wind

I am sharing a couple of projects using twine from Whisker Graphics.  I had so much fun winding and playing with the twine.


First I got out some different sizes of acrylic blocks used in stamping and some Divine Twine.  I next wrapped the Divine Twine around the blocks.


Then I took a cream colored piece of cardstock.  I inked the Divine Twine using my Tim Holtz inks.


After getting the Divine Twine inked I started putting the block on the cardstock.  The more you use the block the darker your ink will appear on the cardstock. Just keep adding as much or as little as you want to the cardstock.


Once I had what I wanted on the cardstock, I inked around the edges. Now you get to add your photos and embellishments. I used the Divine Twine that I had wrapped around the blocks and added that to the layout as well.


The 2nd project is using kind of the same technique but this time making a card.


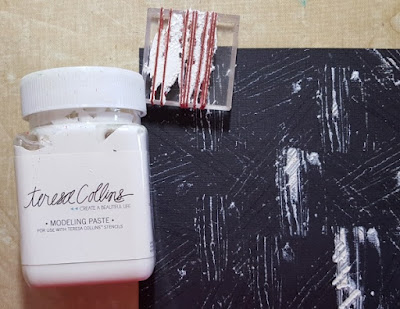
I used one of the blocks that I used to ink the cardstock but this time I put modeling paste on the Divine Twine and stamped in on a black piece of cardstock.


This is what is looked like when it dried.


Very fun technique to try.  Of course, keep your Divine Twine and use it again on another project.


Thanking you for stopping by and I hope you give one or both the techniques a try.